Recently I spent some time in Yogyakarta, the batik capital of the world. While being there, I could not miss the fantastic opportunity of learning more about batik and its history. I also decided to put my hands on some batik tools and learn myself how to make it.
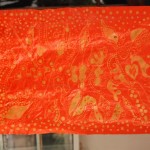
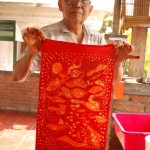
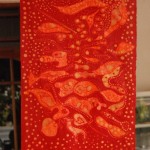
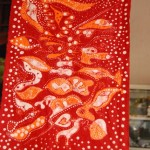
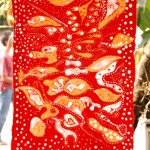
After going through some research, I have decided that the best option to learn how to make batik is with Dr. Hadjir, who has 30 years teaching experience. So I paid $35 and enrolled for his 3 day batik course. We agreed, that I would make three batiks – the traditional Indonesian Ornament, and two patterns of my own choice and design.
I have to say that the course was worth every penny spent, and now I cant wait to be back home and do more batiks.
How does the batik making process look like?
1. First of all, we need to chose and prepare the fabric. It is the best to start with a good quality cotton. We need paints and some tools (there are many materials and tools that are used to create batik and they look a bit different in various countries). We also need some design idea for the theme or pattern that you want to apply on the fabric. Regardless of how experienced we are and how much preparation we will do, the final outcome always is a surprise (even to these most experienced batik artist).
2. The chosen fabric must be prepared. It is recommended to wash it even few times to remove any dirt. Very often fabrics are also boiled to prevent fabric shrinkage afterwards.
3. The next step is to apply the pattern. We can draw with pencil directly on the material or copy paper patterns. Another way is to cut the pattern out from the paper and sprinkle the edges with charcoal or powdered graphite from the pencils.
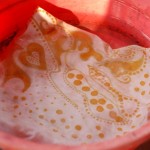
4. The next step is applying the wax along the drawn lines and ornaments. The fabric is usually stretched on a wooden frame, and a special applicator (known in Indonesia as tjanting) is used to apply melted wax. Hand made wax lines and ornaments are really time consuming. This technique also requires precision and incredible patience. It is much faster to apply wax on fabric using special stamps (in Indonesia the stamps are usually made of metal, but in India, very often you can find a wooden stamps). The stamps can vary in size – some are single motifs (flower, animal, geometric pattern), some are large enough to cover the square meter of fabric at once.
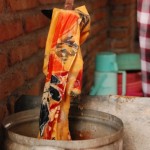
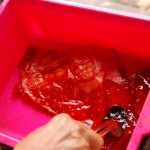
5. When the wax in applied and dry, the fabric can be dyed. Traditionally in Indonesia color is applied in two phases. The first step is to immerse the fabric in a solution of some kind of soda and few other ingredients in order to enhance absorption of color (in the next stage). After that, the fabric is immersed in the actual paint, rinsed in cold water and then it is dried. Modern batik making allows using one stage dying specimens, which considerably simplifies the process. If we want few shades of a certain colour on our batik, we repeat the process of waxing and dyeing few times, always starting dying from the lightest to the darkest colours.
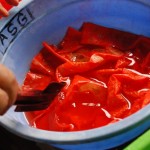
Another way to achieve a multicoloured batik is to apply paint only on the certain areas of the fabric (stretched on canvas) with a small brush or with a stick ended with a sponge or cotton. This technique is used in particularly colorful batiks, where the gradual application of the brightest to the darkest does not work.
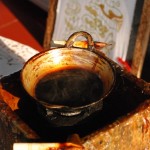
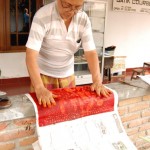
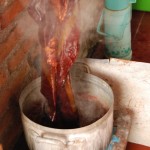
6. The last step is to remove the wax. To do this, we immerse batik for few moments in boiling water. There are usually some special substances mixed with the water helping to remove the wax (e.g. soda).
Below are some galleries where you can see my first batiks through the different stages of their completion.
BATIK SHOPPING LIST:
melt pot
Batik Wax Melt Pot
wax
tjantings
Tjanting Tool 35mm bowl, 1mm spout
Tjanting Tool 35mm bowl, 1.5mm spout
colors
Batik Navy-Jacquard Procion Dye
Batik Turquoise -Jacquard Procion Dye
Batik Dye Jet Black 8Oz
Batik Carmine Re-Jacquard Procion Dye
Traditional batik – step by step

‘Stained Glass’ looking batik – step by step